Thursday 17 July 2014

PROJECT 2 : UNDERSTANDING FORCES IN SOLID STRUCTURE AND SURFACE STRUCTURE

In this project, we have to understand both solid and surface constructions respectively. Moving on, we are assigned to select a building to further conduct research to aid in the development of the latter process and the physical model. The building that our group have identified is, Haesley Nine Bridges Golf Club House, Korea by architect Shigeru Ban. The component that we intend to highlight is the construction of the surface of this building. The interesting form of this architecture draws our attention. From there, we have conducted a thorough research to understand the building more deeply such as the concepts adapted, materiality and the approach in construction. Based on the gathered information, we then brainstormed for ideas on the physical model we are supposed to produce. Based on trial and errors, we have came up with a final design for our physical model and then proceeded into the making of the final model showing the form and details of the construction. To sum up, we have also produced a brief report regarding the building constructions to aid in the understanding of the building as well as to clarify our findings. The development process have also been recorded together with evidences to clarify our findings. Below are the final submissions :

1) Report

2) Final model


3) Individual component


Learning Outcomes :

  1. Able to identify the basic structural systems in constructions.
  2. Further understand the construction of surface structures.
  3. Able to generate relationship with the real world designs based on the studied building.
  4. Understand the studied building in depth.

PROJECT 1 : SKELETAL TOWER

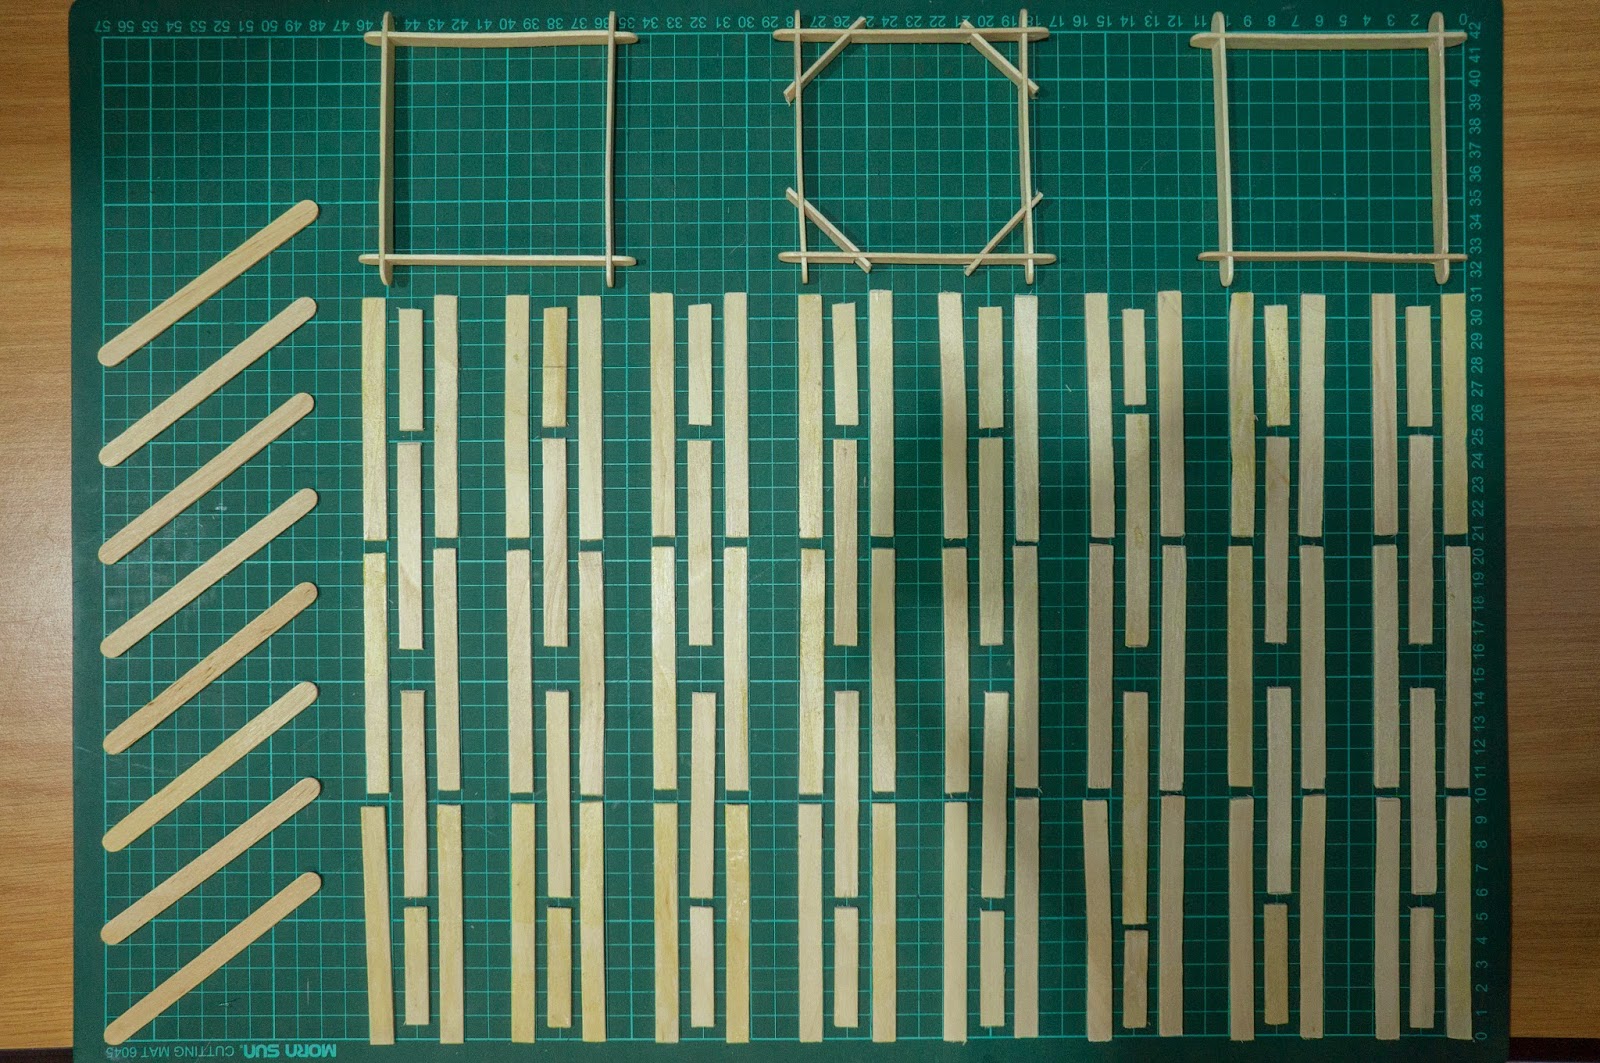
In this project, we are assigned to build a tower using popsicle sticks as the main component and connectors like toothpicks, skewers and threads but no adhesives like glue. However, the number of sticks should be hundred or less and it is required to have a height of at least 30 centimeters. Based on the requirements, we drafted a few designs along the process and tested before concluding a final design. The aim we are achieving is to have our tower to withstand a great load while still minimizing the weight of the model which are affected by the number of sticks and the components that build up the whole tower. This is crucial in order to have a higher efficiency value. To sum up, we have been quite successful in the attempt to achieve our goals as our efficiency value is considerably high. Below shows the process to the final design and test :

1) Mock-up model


Us, with our mock-up and final models.

2) Final Model


3) Testing

The testing process was recorded. Link to the video, here.

For more photos and information, click here.


Learning Outcomes :

  1. Understand construction systems.
  2. Recognize the implication of construction systems in design.
  3. Able to analyse issues of strength, stability and stiffness of structures.


PROJECT 3 : DESIGNING A VISITOR INTERPRETIVE CENTER (VIC)

Moving on from the previous project, the final task is to incorporate all the information and interpretations gained throughout into a design. In this project, we are assigned to design a Visitor Interpretive Center (VIC) on the site chosen. The design of this center has to translate the context, history and all necessary information from the site. Therefore, after much considerations and plannings, I have came up with a design that is based on my concept which is, DEFENSE & NATURE. This design intends to let users understand the functions of the Labrador Park in Singapore both, in the past and in the present. The final design can be identified below from the final boards that presents my idea.


Below are the physical-sectional model at the scale of 1:75 :


Learning Outcomes :

  1. Understand the history of the site and connection with the structures, remnants etc. 
  2. Able to analyze and conclude data and communicate the findings.
  3. Able to understand and translate the poetics of the space.
  4. Realize the importance of a design to be strongly dependent to the site.
  5. Ability to translate concepts into forms.
  6. Able to generate visualization through both 2D and 3D modelling and drawings.

PROJECT 1 : CASE STUDY : IDENTIFYING INNOVATIVE PASSIVE DESIGN STRATEGIES

In this project, we are to select two buildings; one in Kuala Lumpur and the other one in Singapore both that are being recognized and certified as Green Building. Two buildings that have been chosen are, 1) Wisma REHDA, Kelana Jaya 2) City Square Mall, Singapore. Based on that, we are assigned to identify the passive design strategies for each building followed by a thorough research on the principles and the details for the respective designs to perform best in the respective context. Interviews have also been conducted with the respective guides of the building and recorded. Apart from that, integration of software like Ecotect also aids in proving the effectiveness of the passive design of the respective buildings. From there, information have been gathered like such, sun analysis, thermal analysis and wind analysis. Sketches to further illustrate the key designs have also been recorded. The recorded information are in the form of a report which can be referred to as below :

1) Wisma REHDA
2) City Square Mall

Learning Outcomes :

  1. Able to identify environmental conditions.
  2. Understand the effects of sun on the thermal performance in buildings
  3. Understand the effects of insulation, thermal mass and air movement on the thermal performance in buildings.
  4. Realize the importance of context-to-design relationship.


Monday 7 July 2014

PROJECT 3 : A MAXIMUM 90 SECONDS ANIMATION OF THE COMPLETED 3D SCENE

To kick start this task, I had first created a simple storyline for my animation. From there, plans have been made such as the frames I wanted to details such as lighting that I would like to achieve. Firstly, I made an introduction to include a preset tree from the software and I made the leaves moving as tho they are blown by wind just to fit the audio of my introduction. Then, all other frames have been rendered again, to fit with my audio with the theme of "moody". As for the ending, I have made sort of a reverse of my intro. The whole concept of this animation is to be based on the feeling in a moody day accompanied by thunder and the feeling after the fading thunder. Below are the process of this project :

Figure 1. After planning out how the scene would run, I made the pathway for the camera using lines. In this case, the line is linear spreading across the living room.
Figure 2. Next, a free camera was added into the scene. It is orientated to the scene and attached to the pathway using path constraint.

Figure 3. Then, I moved on to change the settings and began to render.

After acquiring all the scenes, they have been edited using windows movie maker. This animation has a span of about 1 minutes and below is the final animation, hope you enjoy :


Link to my video on Youtube : click here